Antique Furniture Marks and Materials Guide: appraisal basics
Antique furniture identification should combine marks or labels with wood, joinery, hardware, secondary materials, finish, wear patterns, repairs, and construction methods rather than relying on one clue alone.
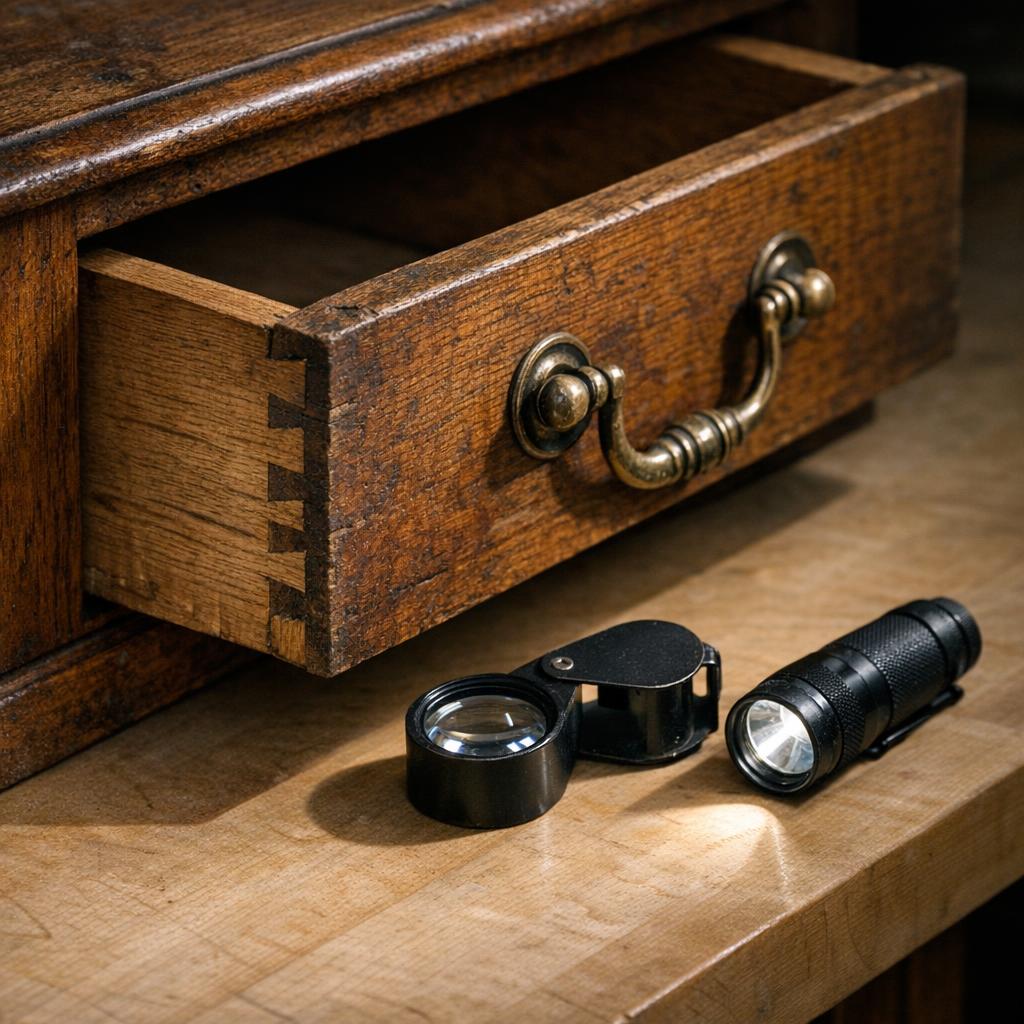
Hand-cut dovetails. Irregular spacing and tool marks are usually more convincing than perfect symmetry.Appraisily generated referenceMarks and labels. Look for stamps, chalk, and paper labels only after you’ve checked the structure around them.Appraisily generated referenceRaking light. Side light reveals wear patterns, sanding marks, and finish changes quickly.Appraisily generated referenceBacks and bottoms. Old nails and shrinkage gaps often tell a truer story than the polished front.Appraisily generated referenceOriginal hardware. Look for oxidation, slot wear, and matching patina around screw heads.Appraisily generated referenceVeneer and secondary woods. Old veneer, glue lines, and hidden woods help date the casework.Appraisily generated referenceCommon mistake. A later Phillips screw can instantly tell you a piece has been altered.Appraisily generated referenceFinish wear. Honest wear is localized; later polish tends to flatten the surface story.Appraisily generated reference
When to get a pro appraisal or send photos
If the piece is valuable, unusual, or still unclear after a careful inspection, the best next step is to pause and get a second set of eyes. The right specialist can sort period work from later revival furniture, separate honest restoration from over-restoration, and help you understand whether the marks actually matter.
That is especially important when the item may need insurance, sale, donation, or estate documentation. A quick written opinion is cheaper than a bad cleanup, a wrong listing, or a missed maker attribution.
FAQ
What is the fastest way to identify antique furniture?
Start with the underside, drawer interiors, and back panels under raking light. If the construction, marks, and wear all agree, you’re usually close.
Are labels enough to prove a piece is antique?
No. Labels help, but they should match the joinery, wood, fasteners, and finish. A label without structural support is just one clue.
How do I tell a reproduction from a true antique?
Look for uniform machine work, modern screws, plywood or MDF, and over-even wear. Reproductions often mimic style better than construction.
Should I clean antique furniture before an appraisal?
Not aggressively. Light dusting is fine, but avoid refinishing or polishing until you know whether the surface is original and valuable.
What photos should I send if I’m still unsure?
Send the front, back, underside, drawer bottoms, hardware close-ups, labels, and any damaged or repaired areas. The hidden surfaces usually settle the question.
Note: We couldn’t find enough auction records that directly match Antique Furniture Marks and Materials Guide to publish a defensible price table. If you are valuing a specific item, include its maker, model, material, photos, and condition so the search can be narrowed.
What similar items actually sold for
The current auction search does not contain at least three clean, directly matched sales for Antique Furniture Marks and Materials Guide yet. If you’re valuing a specific item, use the free estimate flow so the search can be narrowed by maker, material, photos, and condition.
Image
Description
Auction house
Date
Lot
Reported price realized
No relevant auction comps found for this topic right now.
Disclosure: prices are shown as reported by auction houses and are provided for appraisal context. Learn more in our editorial policy.
Choose your next step
Use the path that matches the decision you need to make about the item.
Not sure it is worth appraising?
Start with a lower-friction screen to understand the likely category, evidence, and next step.